Image Masking Service


Hair Masking or Image Masking
Image masking is a technique used in graphics software such as Photoshop to conceal as well as expose parts of an image. It is a non-destructive image altering method. It usually allows you to edit and modify the mask later if needed. We provide the best image masking service at clippingpath.ca.
Photoshop Masking
When we make a mistake while editing a photograph, we often think there is no way to undo it. But Photoshop came out with Masking to solve this problem, which I think is fantastic for all Photoshop users. We can wipe anything or make it invisible with Masking, but we can immediately erase that erased region or make it visible again. We use the PaintBrush and the colours Black and White to accomplish photoshop masking in clippingpath.ca.
Our Image Masking Service in Photoshop
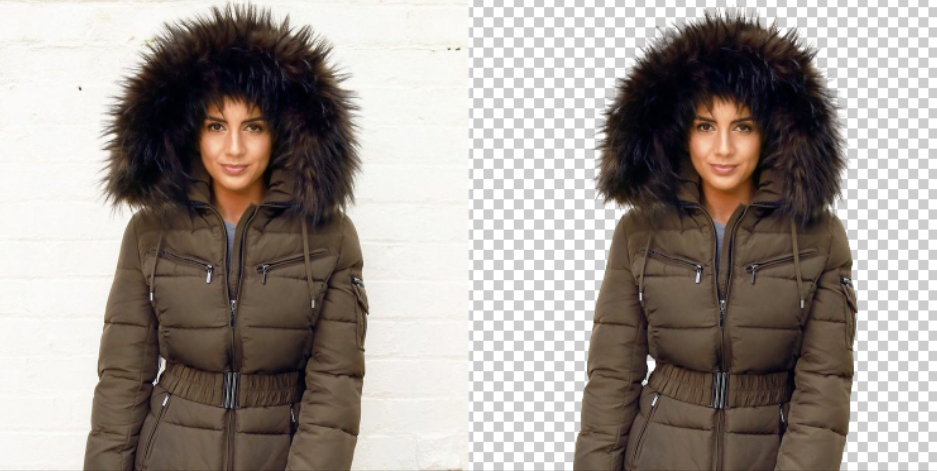
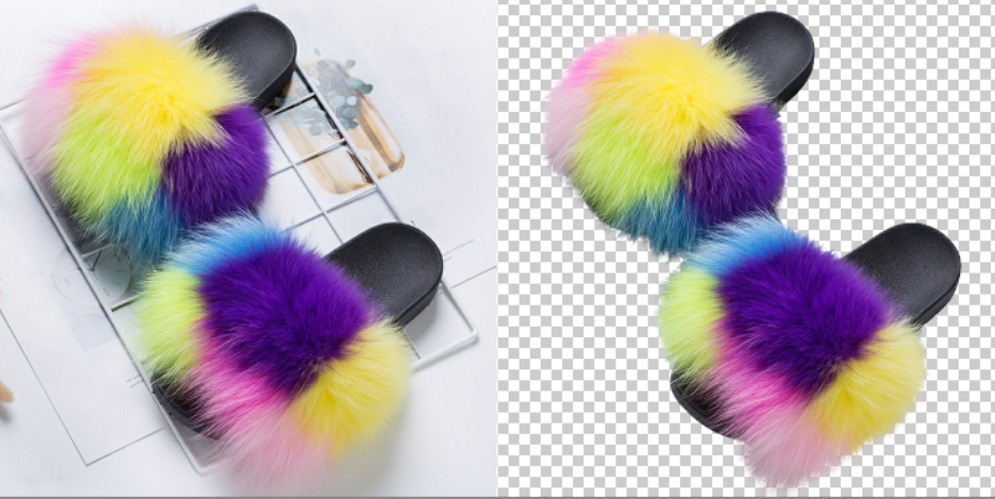
Image masking offers a wide range of applications. Here are some advanced backdrop removal techniques. To eliminate or substitute the background of a picture with soft edges such as human hair, furry clothes, dolls, etc. The photo masking technique is used in conjunction with the clipping path technique.
Clippingpath.ca uses the clipping path technique for harsh edges and masking for fuzzy or soft edges. When the clipping path technique alone is insufficient to capture more exact details of soft edges, the photo masking technique is used to segregate the item from the background.
What is a Photoshop Mask?
Photoshop came out with Masking to tackle this issue, which I believe is phenomenal for all Photoshop clients. We can wipe anything or make it undetectable with Masking, however we can cause a prompt to eradicate the locale or make it noticeable once more. We utilize the PaintBrush and the tones High contrast to achieve photoshop masking in Clippingpath.ca. It allows any picture data from lower layers to peek through.
Difference between image masking and clipping path
The approach you employ to remove the background from an image is the difference between clipping path and image masking. Although clipping path can potentially eliminate the backdrop from complex photographs, the outcome isn’t necessarily as pleasing as image masking.
For whom and why image masking service is required
Masking is required to eliminate the background from these photographs if the subject matter of the images is hair, fur, obscure details, or hazy edges and the clipping path is absolutely impossible to bring out a result. Image Masking is a Photoshop service that is available at a higher level. For professional needs, experts like clippingpath.ca need to understand image masking.
How image masking is done
Image masking is a simple procedure. Choose Select > Deselect after making sure no part of your image is selected. Pick the layer or group in the Layers window. Click the Add Layer Mask button in the Layers panel, or choose Layer > Layer Mask > Reveal All to make a mask which exposes the extra layer.
Essential tools in Photoshop for masking
The masking tool, often known as a layer mask, is a function that allows you to cover up all or sections of a layer without completely erasing it. If we use the clippingpath.ca approach, the Brush Tool is the most important tool for masking. By clicking the Add layer mask tab at the base of the Layers palette, you may create a new layer mask on that adjustment layer. To make a black layer mask, hold down the alt key while clicking the button.
Different types of photo masking
1) Layer Masking:
When it comes to masking in Photoshop, the layer mask is the most common sort of mask. We may use masking to hide or show portions of photos, as well as modify the opacity of different parts of an image.
2) Clipping masks:
Clipping masks are used to control the exposure and visibility of another layer by using one layer. Put a layer in the back of the layer we want to apply the transparency to for the clipping mask clippingpath.ca. The visibility of the layer above is controlled from this bottom layer.
3) Alpha Channel Masking:
For cutting out procedures such as removing the background, each image has its own set of properties. As a result, various methods must be used. Different images necessitate alternative strategies. Masking with an alpha channel is a more complicated process.
Photoshop Layer Masking
Photoshop layer masking is a fantastic function that clippingpath.ca is well-versed in. Using Photoshop layer masking is a simple operation. Choose the two photos you wish to mask and divide them into two layers. In the Layers panel, select a layer and click the ‘Add layer mask’ button at the bottom. On the selected layer, a white layer mask thumbnail will emerge, displaying anything on the layer.
Alpha Channel Masking
Alpha channel masking is a pixel-based masking technique that presents images as shapes instead of colors. Since it is an 8-bit channel, it has 256 levels of gray color. Every image in the clippingpath.ca has three or more hues, such as red, green, and blue.
Photoshop Refine Edge Masking
Let’s take a look at how we should use the Photoshop Refine Edge Masking. To access the Select and Mask workspace, click the Select and Mask button in the Properties panel. On the left portion of the workspace, select the Refine Edge Brush tool. Then, to tidy up the mask edge, drag it over the subject’s edge.
Clipping Mask
You can use the content of a layer to mask the layers above it with a clipping mask. The masking is focused via the content of the bottom or base layer. In the clipping mask, the non-transparent area of the base layer clips the content of the layers above it. The clipped layers’ additional content is blocked out.
Collage Masking
Using the collage technique, you can easily create an uneven full face mask. It could be a good complement to the symmetry masks mentioned above in terms of reinforcing geometric principles and how we design objects to represent them. Clipping path but already know the drill: create a new document and drag and drop both photos into it. Compose an updated background layer and fill it with white.
Transparent object masking
The process of masking transparent objects away from their original backgrounds is known as translucent image masking, or transparent masking. Although it is most commonly used to remove unwanted pixels from images in order to make them look more professional.
Translucent image masking
Translucent image masking, often known as transparent masking, is the process of masking transparent objects away from their original backgrounds. Although it is primarily used to remove unnecessary pixels from photographs in order to give them a more professional appearance.
Refine Edges Image Masking
Let’s investigate how we should utilize the Photoshop Refine Edge Masking. To get to the Select and Mask work area, click the Select and Mask button in the Properties board. On the left piece of the work area, select the Refine Edge Brush apparatus. Then, at that point, to clean up the cover edge, drag it over the subject’s edge.
Masking of objects
Object masking is a sort of visual masking that happens when a brief display is followed by a series of little dots that surround but do not touch the region of a target image. Clippingpath.ca is well-known for its excellent object masking services.
Color Masking
Color masking from clippingpath.ca allows you to fine-tune how pixel values on the screen are updated. You can utilize each channel, for instance, to save a separate grayscale image by limiting the color channels written by each drawing instruction.
Photoshop Masking With Clipping Paths
Create a trail around the image region that will produce the silhouette using the Pen tool. Choose Save Path from the panel menu in the Paths panel, and then give the path a name. Choose Clipping Path from the same panel menu.
Far or hair masking
Hair masking is a technique for concealing and exposing sections of an image in graphics software such as Photoshop. It is a non-destructive approach of image modification. You may generally change and modify the mask later if necessary. At clippingpath.ca, we offer the greatest hair masking service.
Why you Choose our image masking service
We continue to use clippingpath.ca’s image masking service since it is the best image masking service available. They flawlessly cover and expose areas of any image without making any mistakes. When it comes to image masking, clippingpath.ca is always the first thing that springs to mind.
.

